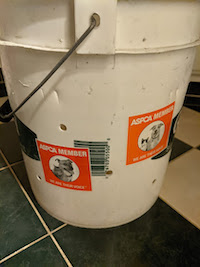
How To Build a Tiered Worm Bin
From 5-Gallon Buckets
You will need:
- 2 or 3* 5-gallon buckets or other containers which can nest together (*depending on planned location)
- 1 lid
- Worm bedding, such as shredded/ripped paper and/or cardboard, or coffee grounds, enough to form at least a 2” layer in the bucket when dampened
- Drill, with small and large drill bits (one 1/16”-1/8" and one 3/8" or bigger)
*If you will be placing the bin outdoors where it can drain into the ground, you can make this with only 2 buckets; if it will be indoors or on a patio/concrete where it can’t drain, you will need a 3rd bucket as a drip basin to catch excess liquid.
Construct the bin:
Take one of the buckets, and drill holes in the side and bottom:
- Large passthru/drainage holes in the bottom.
- Small ventilation holes in the side, near the top, 1/16” or so. You want air to get in, but you don’t want the worms to escape.
- For 3-bucket version: Larger passthru holes in the side, in the bottom half, 3/8” or bigger. Big enough for worms to use to get through. This is important in the 3-bucket version because if overwatered or not drained as needed, it can fill with water and the worms will move up trying to escape the rising water and can get trapped between the buckets. These holes help them find a way into the upper bucket. [If you are doing the 2-bucket version, with no drip basin, you do not need these, because excess water should drain out.]
Tip: Start the big holes by drilling a small hole and then enlarge it with the large drill bit.
Repeat with a 2nd bucket.
These are your worm home buckets.
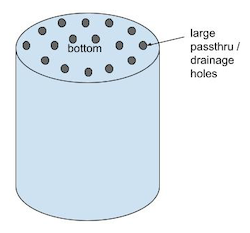
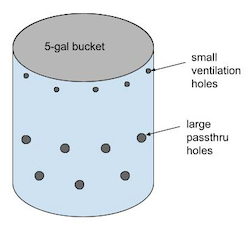
Build the bin by nesting the worm home buckets into the undrilled drip basin bucket (or just into each other, if using 2 buckets).
Soak the shredded paper/cardboard in water until fully moistened, then drain and add damp paper/cardboard to the top worm home bucket.
Add coffee grounds on top of shredded paper. Sprinkle with some water if they are too dry.
Add any food scraps you have, covering with coffee grounds.
Add worms.
Tip: If you cover the top with damp napkins, paper towels, or coffee filters, it helps keep down fruit flies and mold.
Cover it with the lid. Warning: 5-gallon bucket lids can be very hard to remove. You might not want to seal it completely if you don’t have to worry about animals getting into the bin.
As you produce food scraps, continue to add food and bedding until the worm home bucket is about 1/3-1/2 full (filling them too full will cause the bottom to be compacted and the worms to move up before finishing everything; also, lack of oxygen will cause the compost to go anaerobic and start to smell). Then unstack your buckets, take the empty bucket and put it on top of the full one, and add bedding and food to the empty bucket. Worms should gradually find their way up from the full bucket to the new bucket, but if you want, you can help them by digging out some from the full bucket and moving them.

About Containers
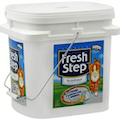
Cat Litter Buckets
My favorite container for this is actually a 28-lb cat litter container. One advantage these have is that the lids are very easy to get on and off. However, it appears that no one uses these anymore (probably for the best, environmentally speaking).
5-Gallon Buckets
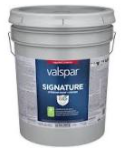
Now I use 5-gallon buckets like you get paint in. The lids can be very hard to get off once closed tightly. (You can buy different lids that are easier to remove here.) Also, they often come with bits of paint or whatever stuck to the inside. I don’t find this to be a real problem, although if you want, you can scrub it with a wire brush and get most of it off. Latex paint, especially semi-gloss or gloss, will often peel off in big swatches (do this before scrubbing at it.) The food industry also uses these buckets for food, which would be a great place to get these, if you have a source. These can also stick together and be hard to separate (see below.)
Sticking
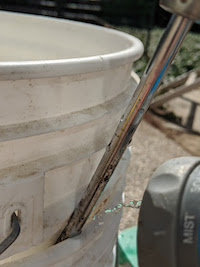
Buckets are also prone to getting stuck together. This is especially common when you mix buckets from different manufacturers, but it can happen any time. So here is how to separate them (this assumes the bottom bucket has no holes in the bottom):
- If there are no holes in the top bucket, you will have to stick a flat-head screwdriver or similar tool between the two buckets to create an opening.
- Drizzle water into the opening, or, if the top bucket has holes in the bottom, just run water into the top bucket.
- When the water fills up the empty space in the bottom bucket, the top one will come off: if the top bucket has no holes, it will usually just float off; if the bucket has holes, you may have to tug on it a bit.
Preventing Sticking
Of course, once you've built your worm bin, you want to make sure the buckets do not stick together, because you don't want to have to flood your bin to separate it. If your bucket came with a paper or plastic label, don't remove it; it will help prevent a tight seal from forming. If your bucket doesn't have any labels, add stickers to the outside of your bin.
